[查看中文说明] · [DNSonly VPN setup]
VPN is a technique to connect clients to private networks. Wikipedia
There're many VPN protocols such as IPsec,IKEv2,OpenVPN,and Cisco AnyConnect etc. This blog will demonstrate how to setup OneMole VPN on Windows 10, MacOS High Sierra, iOS 10, and Android 4.3.
Windows 10
Windows 10 has built-in VPN clients that support PPTP and IKEv2, and SSTP protocols. SSTP is not supported by OneMole VPN though because it is not widely used by people.
Download certificate
You'll need to download and import certificate before you may use OneMole VPN on Windows.
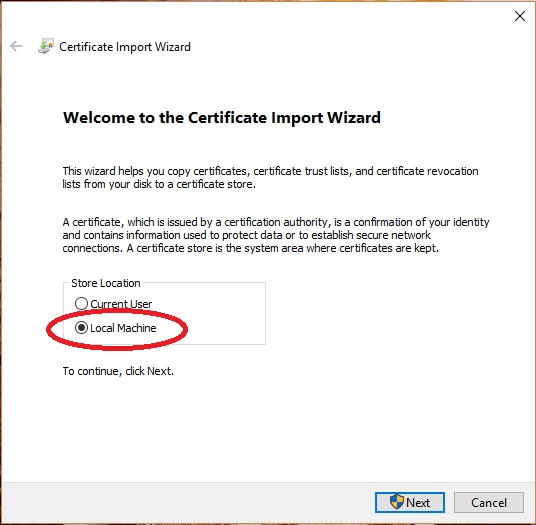
- Log in to https://my.onemole.net and click on the
Detailsbutton next to your server name. ChooseIKEv2and click onWindowsto find the link for the user certificate. Download and double-click to install. ChooseLocal computerto import the certificate. See the following picture as a reference.
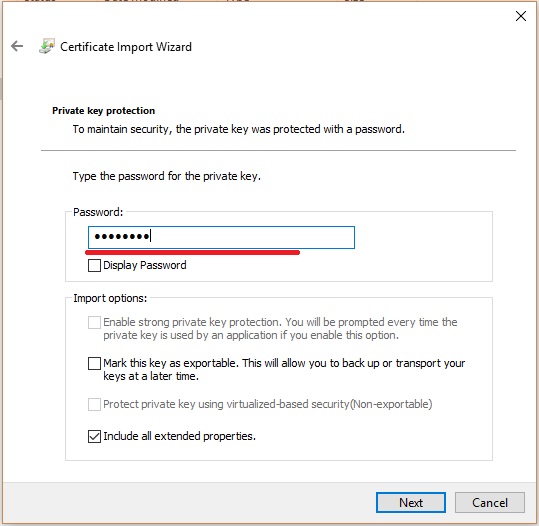
- Enter the password of your certificate, which is the same as your OneMole VPN password.
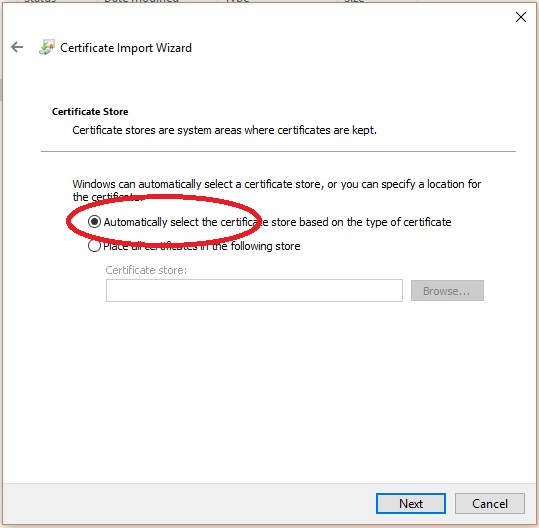
- Allow Windows 10 to choose certificate storage automatically, and finish importing following the guide.
IKEv2 VPN
To use IKEv2 VPN on Windows 10, you need to add a VPN connection first.
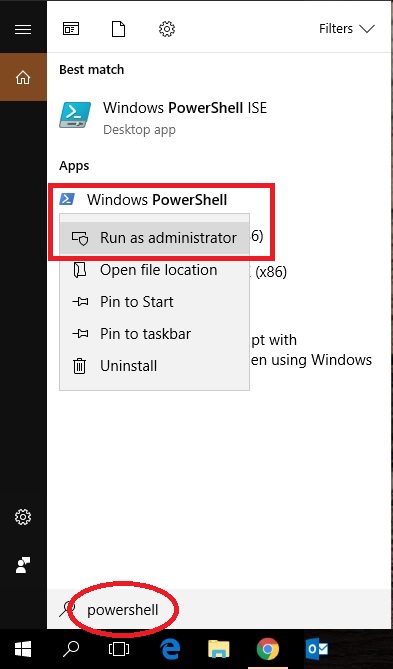
- Click on the Windows button.

- Key in
powershelland right-clickWindows PowerShell, clickrun as administrator.
- Key in
Add-VpnConnection -Name "OneMole VPN" -ServerAddress "Your VPN Address" -AuthenticationMethod Eap -EncryptionLevel Maximum -RememberCredential -TunnelType Ikev2You can find your VPN address at https://my.onemole.net, use the address to replace theYour VPN Addresspart in the command above. See the following picture as a reference.

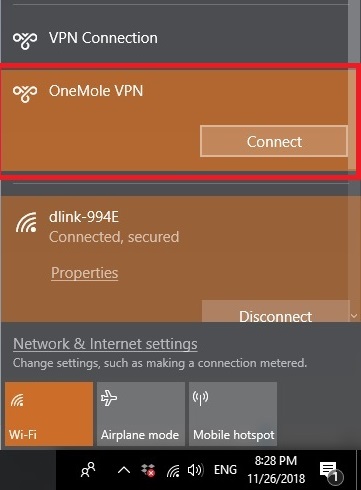
- Click the internet icon in the bottom right corner.

- Connect OneMole VPN, enter username, password.
Cisco AnyConnect
Although Cisco AnyConnect is not pre-installed on Windows platform, it is still one of the best VPN protocol on Windows.
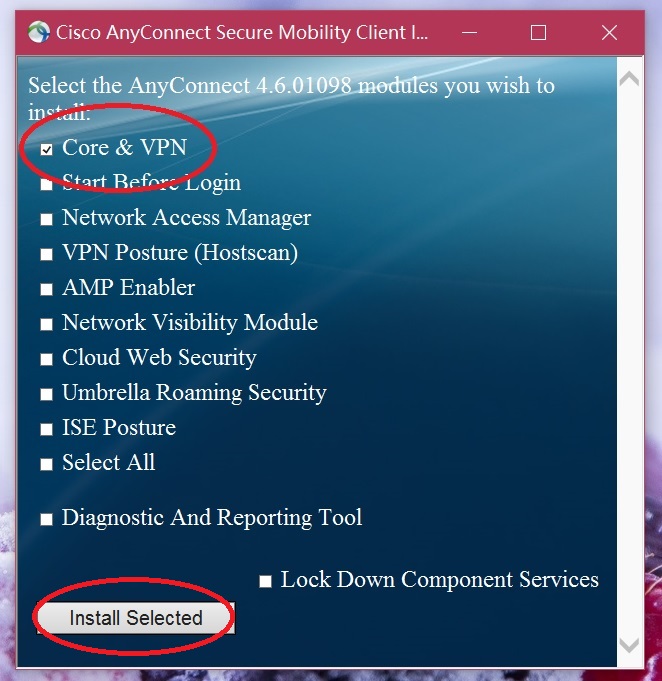
- Download AnyConnect client, extract and double-click
Setup.exeto install. ChooseCore & VPN, and clickInstall. See the following picture as a reference.
- You may now run AnyConnect client from Windows menu.
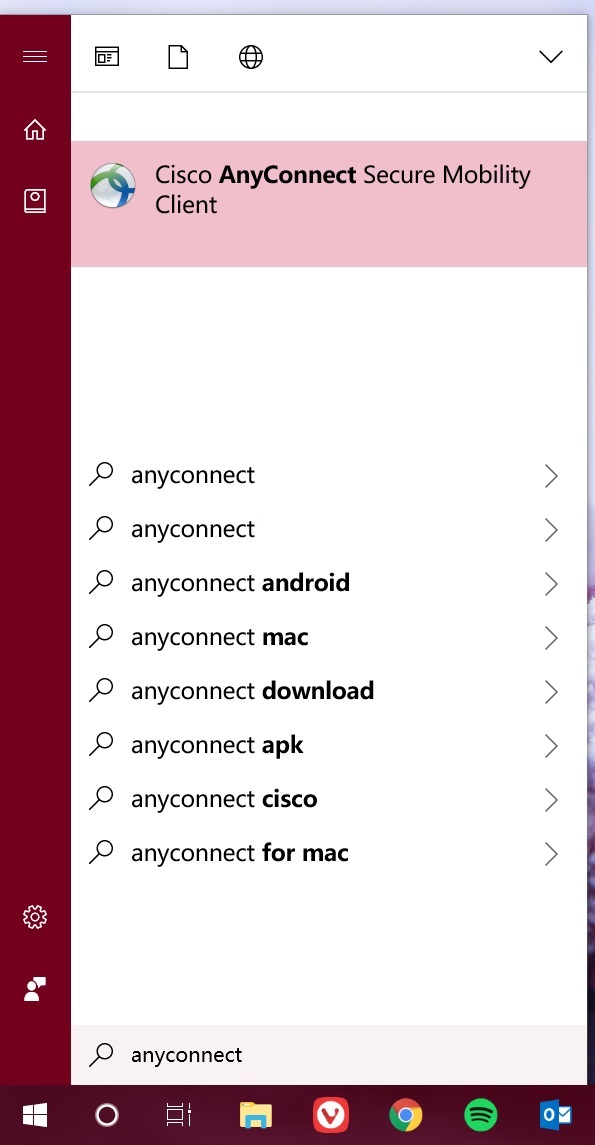
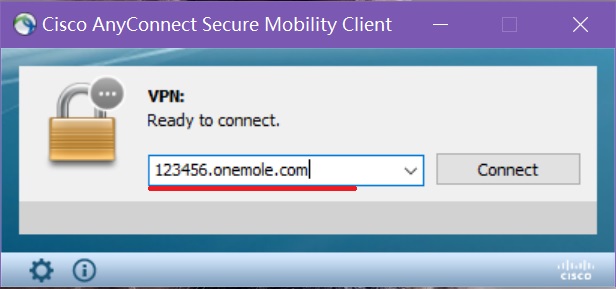
- Execute AnyConnect client, enter your OneMole VPN address (you may find it at https://my.onemole.net). You can now connect to your VPN.
iOS 10
There're many built-in VPN clients on iOS 10, including IKEv1 (Cisco IPsec VPN) and IKEv2, and Cisco AnyConnect can be easily installed from App Store.
IKEv1
You may use the built-in IKEv1 client on iOS 10 via Pre-Shared Key (PSK) or your VPN certificate.
The following describes manual setup of VPN connection. However, you may simply download the corresponding configuration profile from https://my.onemole.net, tap on the profile and import to your iOS system directly without manually setting up the connection.
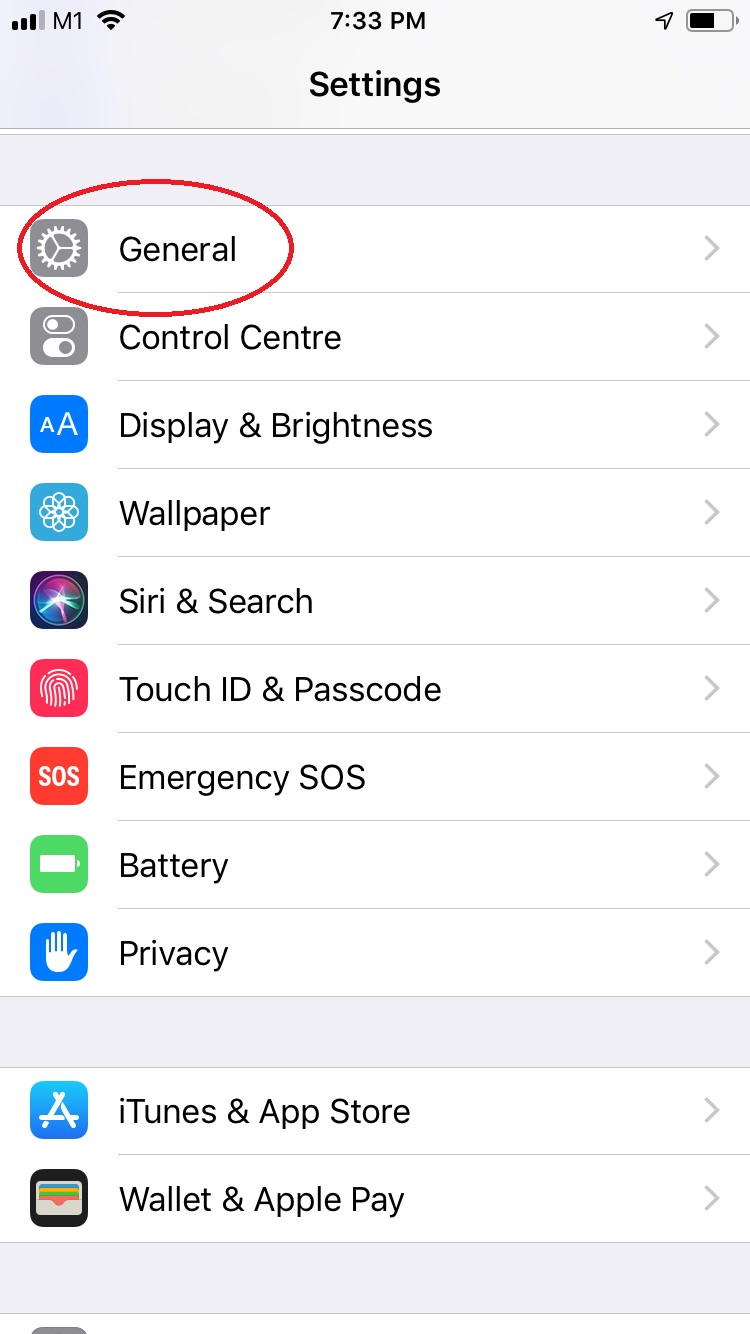
- Open
Settingsand selectGeneral.
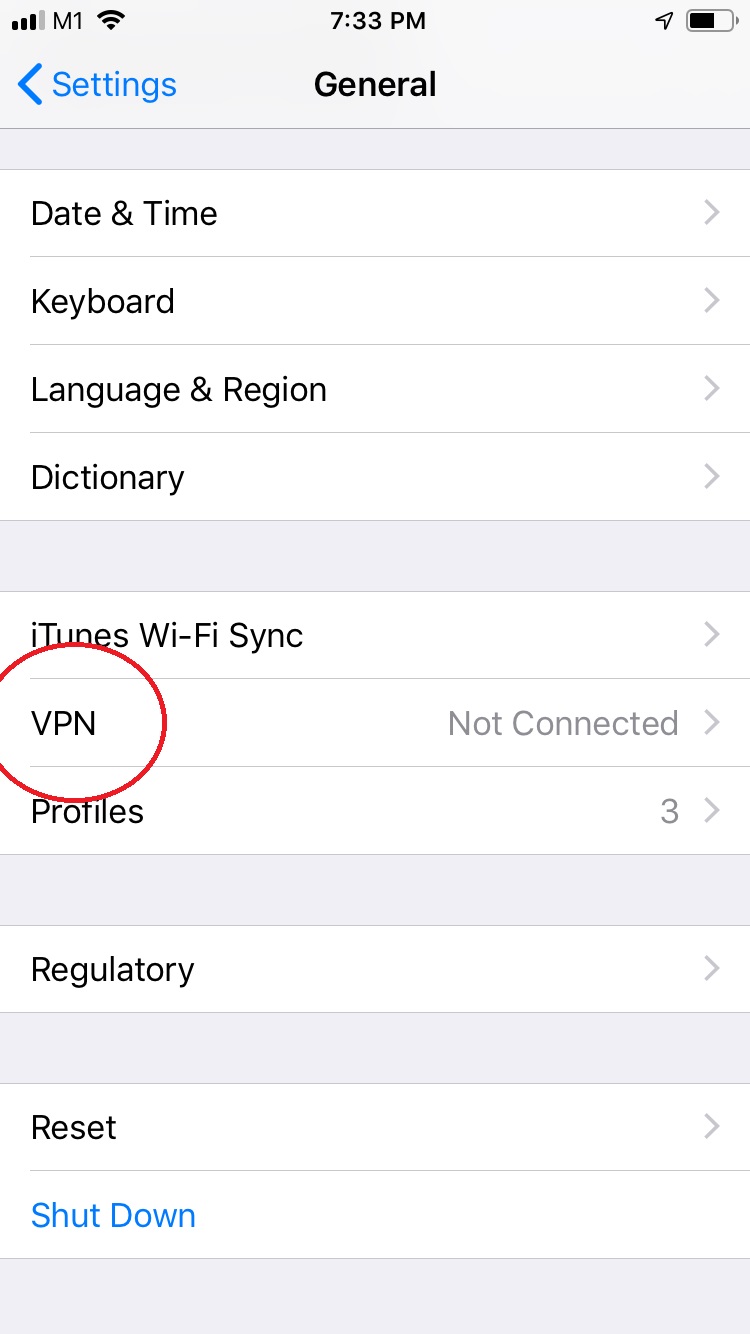
- Tap
VPNand add a VPN connection.
-
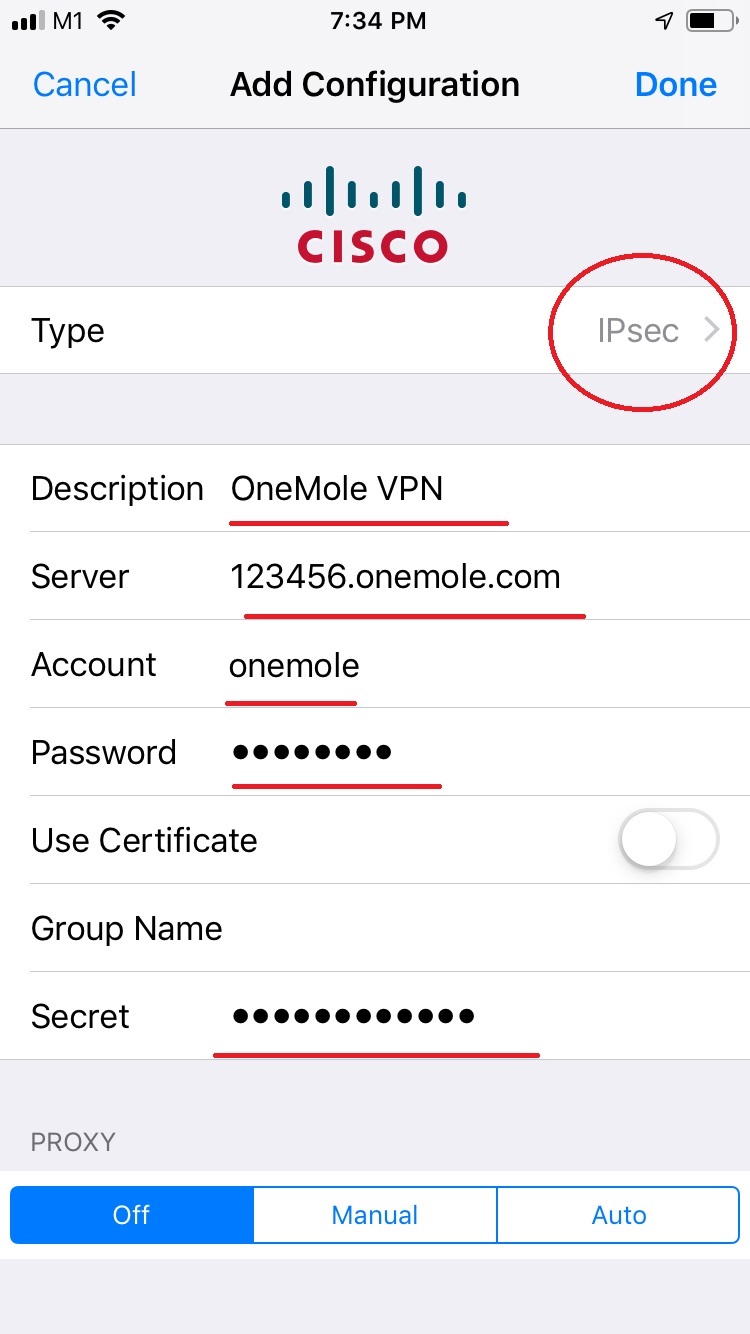
Tap
Type, and chooseIPsec. Key in Description, Server, Account, and Password.-
If you use OneMole VPN Pre-Shared key for login, enter it in Secret, the pre-shared key can be found at https://my.onemole.net
-
If you use certificate for login, you need to import your VPN certificate first, and then choose
Use certificateand select your certificate.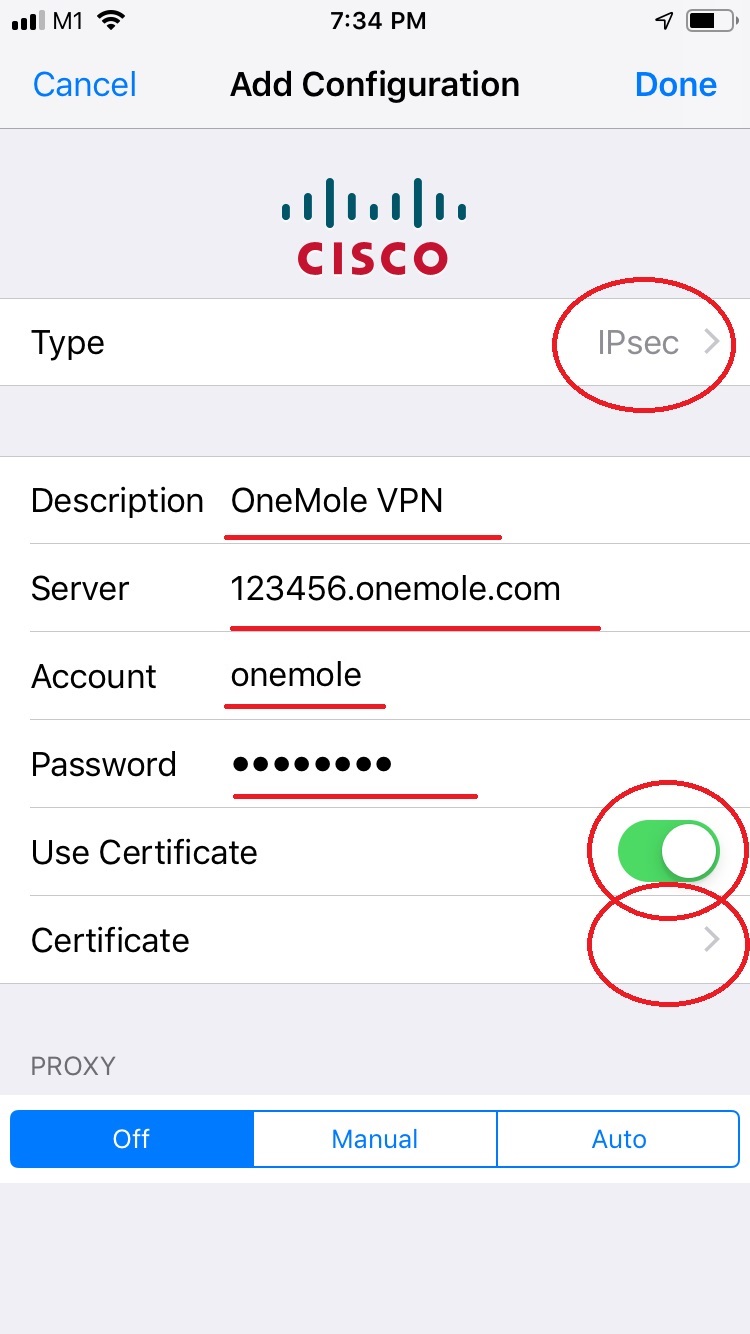
-
You OneMole VPN certificate can be downloaded from https://my.onemole.net. Import both the Root certificate and User certificate to your iOS device by simply tapping on your certificate files, and following the instructions from your iOS system. The password for your certificate is the same as your OneMole VPN password.
-
IKEv2
The following describes manual setup of VPN connection. However, you may simply download the corresponding configuration profile from https://my.onemole.net, tap on the profile and import to your iOS system directly without manually setting up the connection.
Similar to IKEv1, you need to add a VPN connection and choose Type as IKEv2. Enter Description, Server, Username, and Password. You need to enter Remote ID(the same as server address, NOT IP), and choose User Authentication as Username.
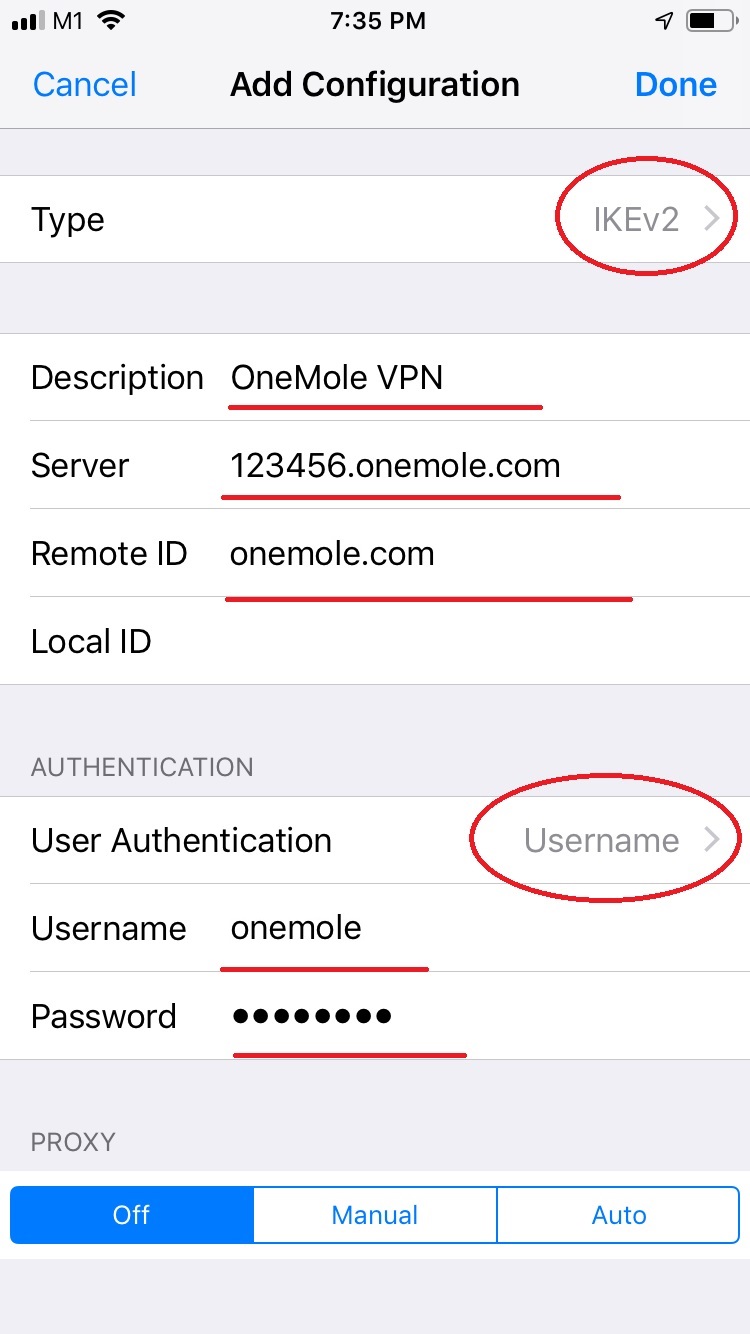
Now you can connect to your OneMole VPN on your iOS devices.
Cisco AnyConnect
You can easily install Cisco AnyConnect from the App Store.
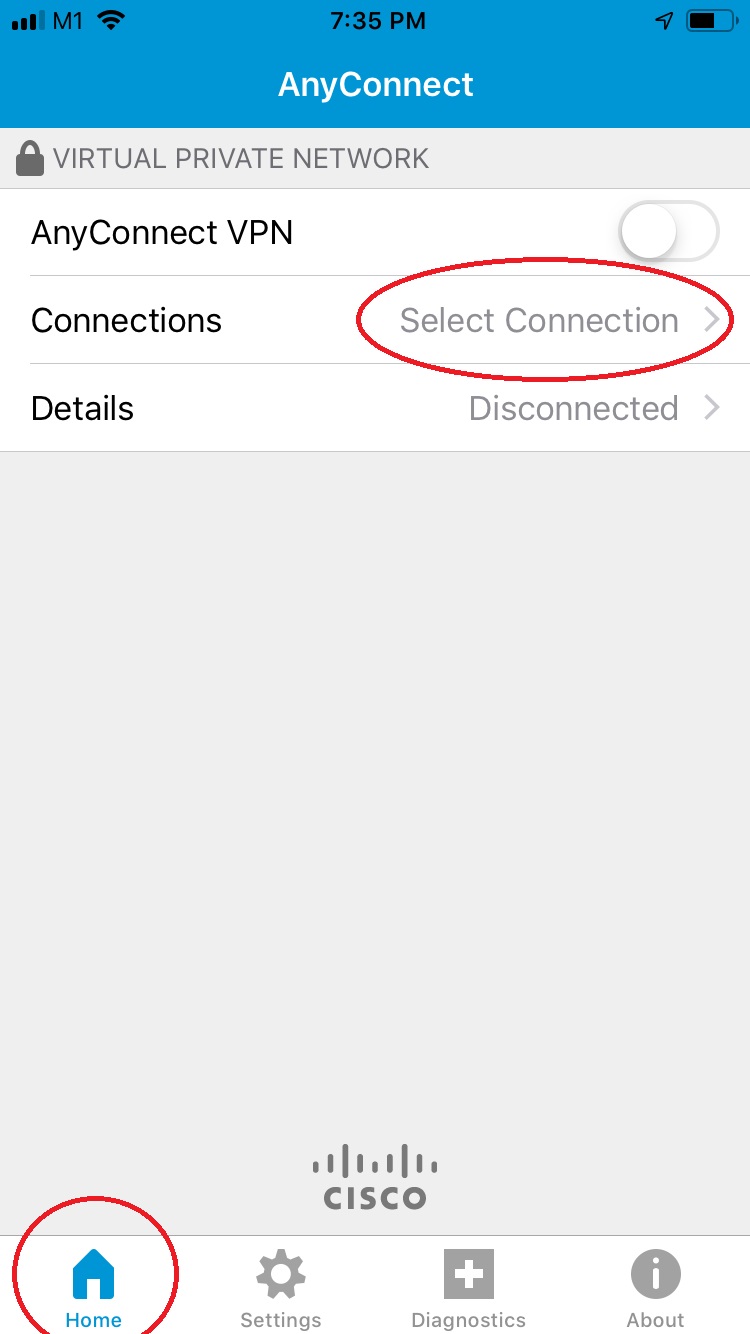
- Choose
Select Connection.
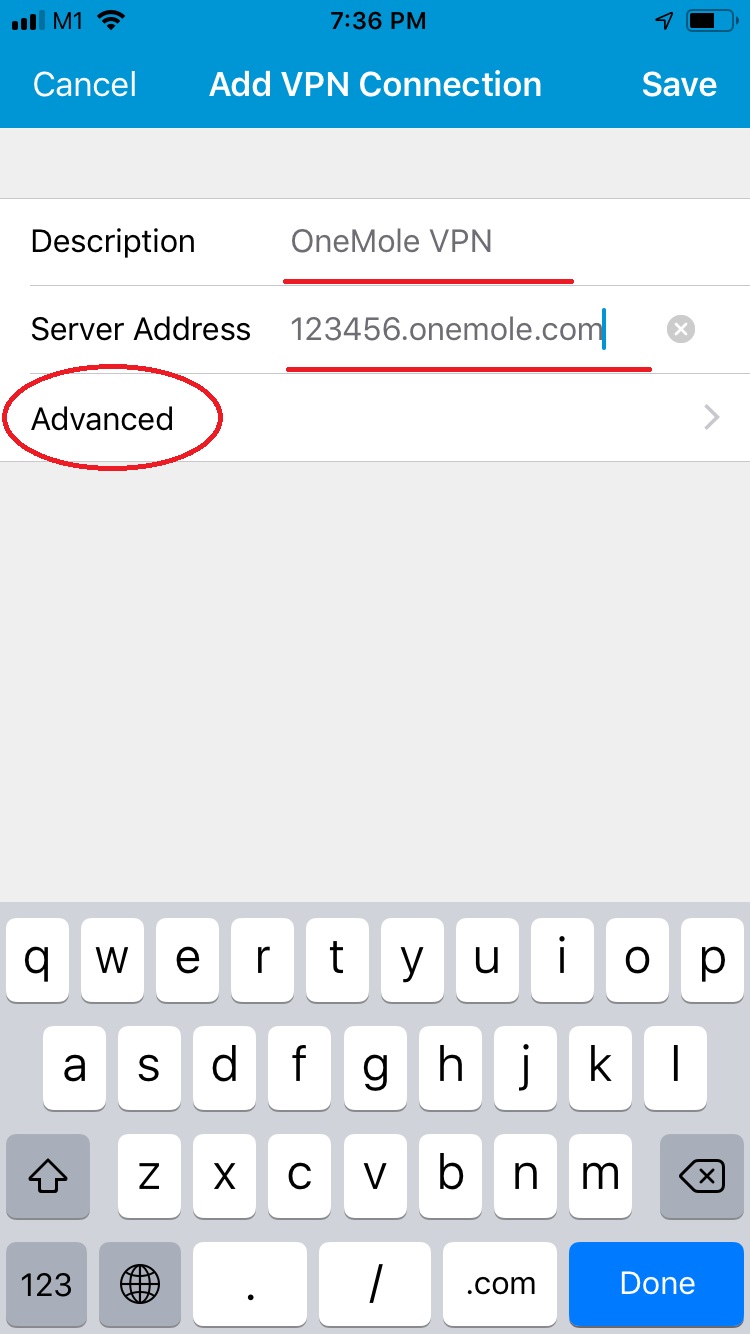
- Tap on
Add VPN Connection.
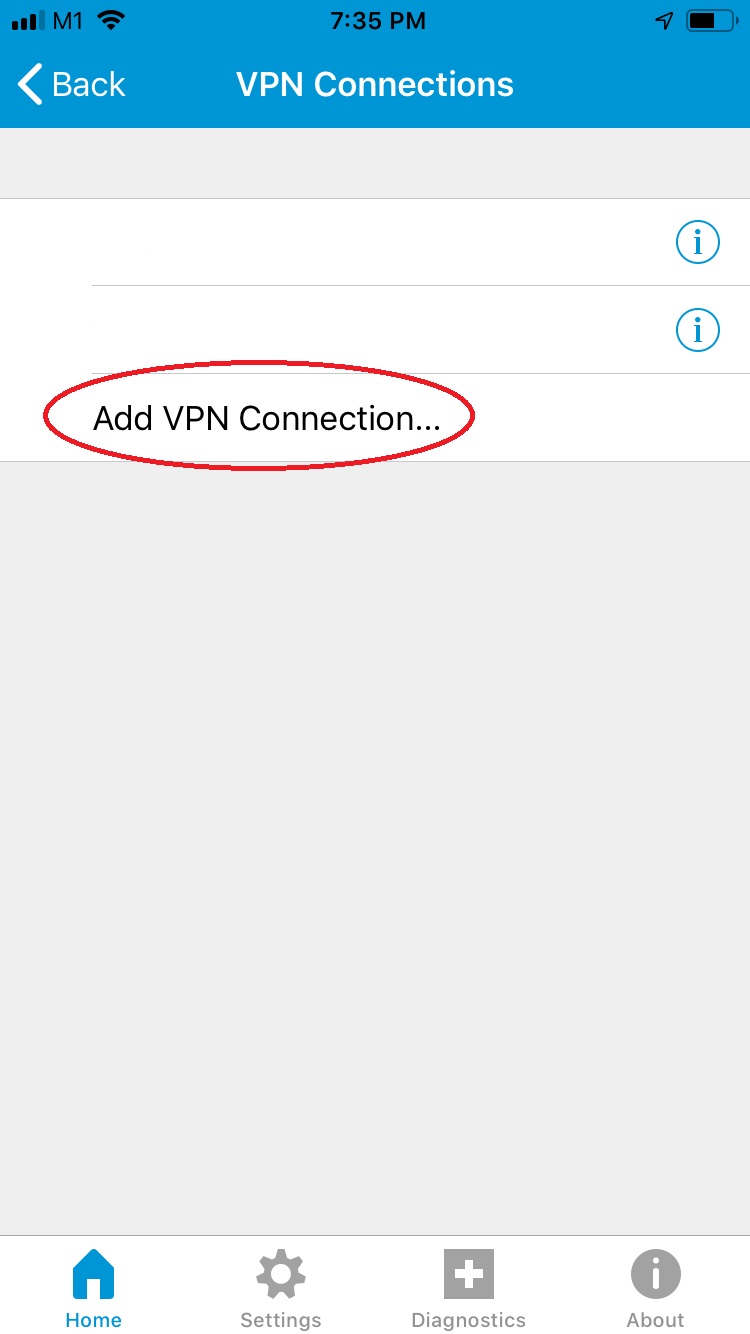
- Enter Description and Server Address and
Save. Choose the VPN connection you just saved.
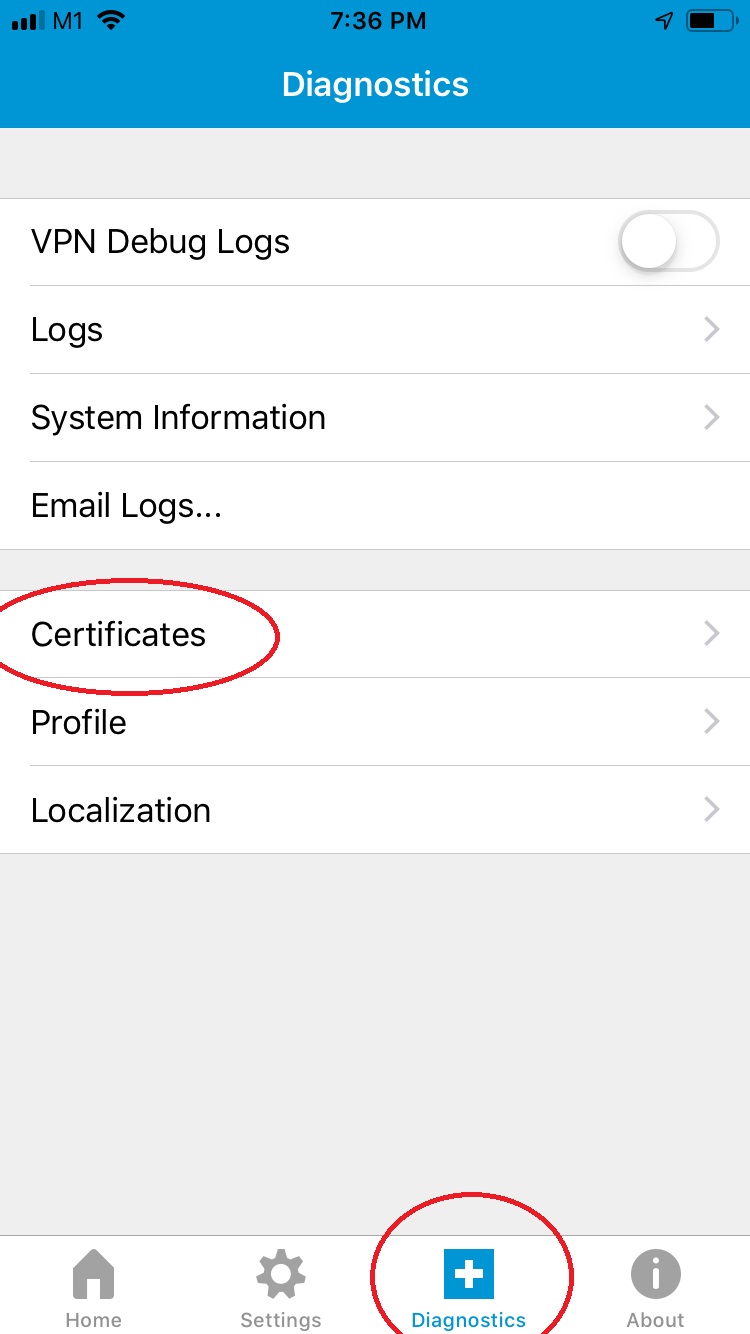
- Go back to the app
Home, tap on theDiagnosticsbutton at the bottom, and then tap onCertificates.
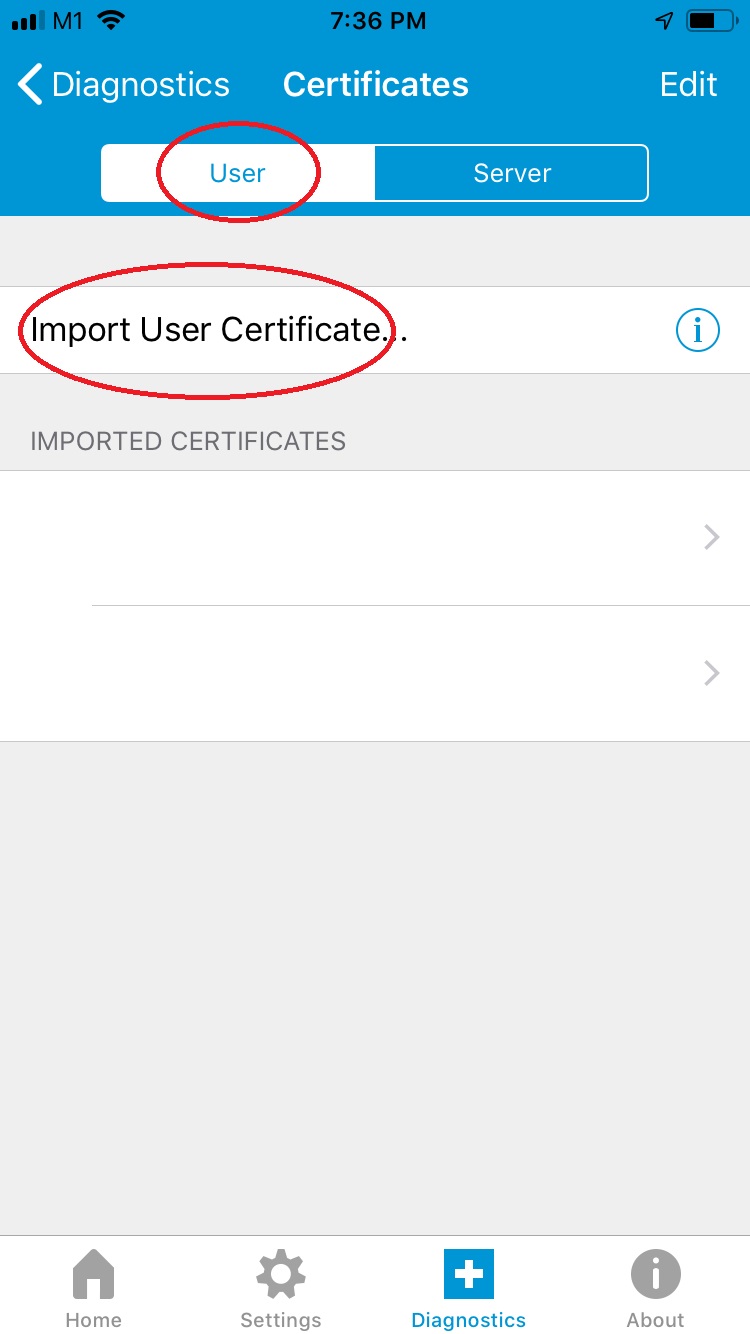
- Tap on
Useron the top, and thenImport User Certificate. Enter your VPN certificate import address in the dialog that pops out. You may find your VPN certificate import address from https://my.onemole.net. The password for your VPN certificate is the same as your VPN password.
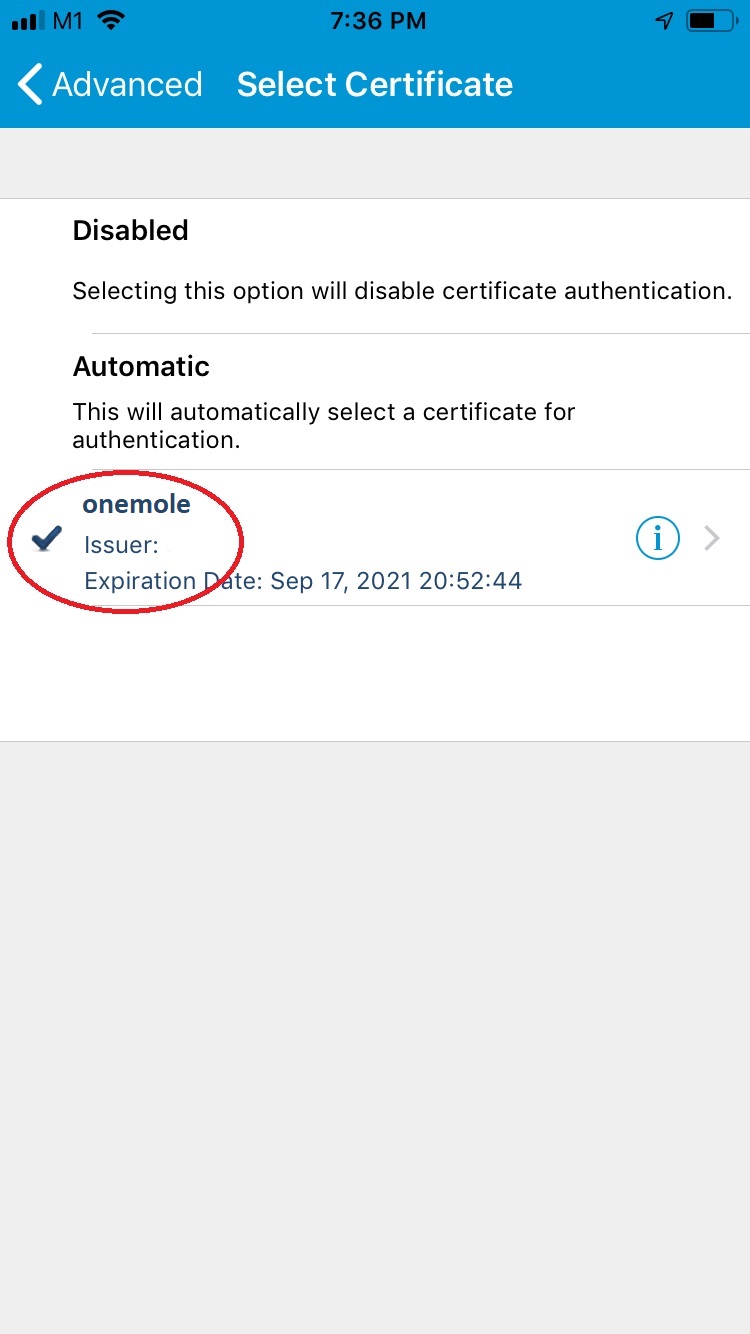
- Go back to the interface in
Step 3, tap onAdvanced, and then tap onCertificate - Automatic.
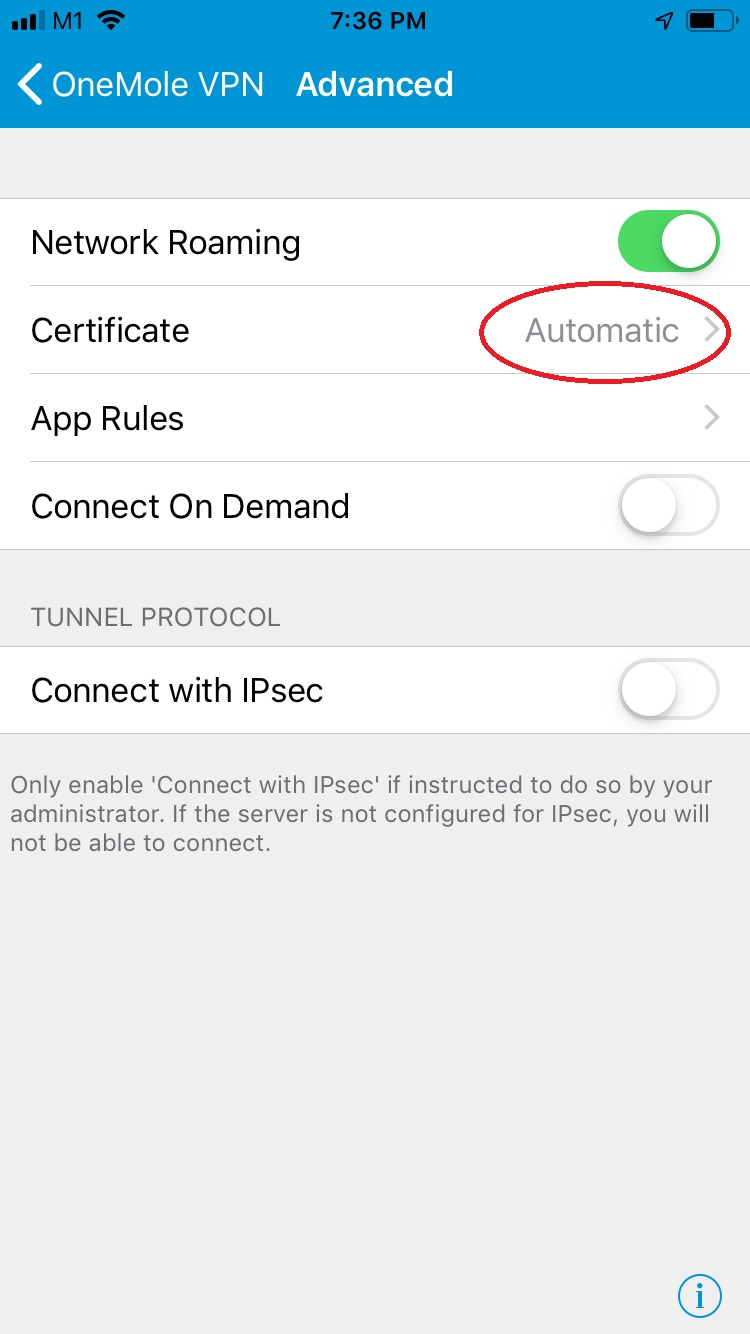
- Choose your certificate and go back and save. Now you can connect to your AnyConnect VPN.
Note: You need to de-select the Connect with IPSec option from the Setting page. You need to allow untrusted server if you connect to VPN via IP.
MacOS High Sierra
MacOS High Sierra is very similar to iOS 10 and it has built-in supports for IKEv1 (Cisco IPsec VPN) and IKEv2.
IKEv2
The following describes manual setup of VPN connection. However, you may simply download the corresponding configuration profile from https://my.onemole.net, tap on the profile and import to your MacOS system directly without manually setting up the connection.
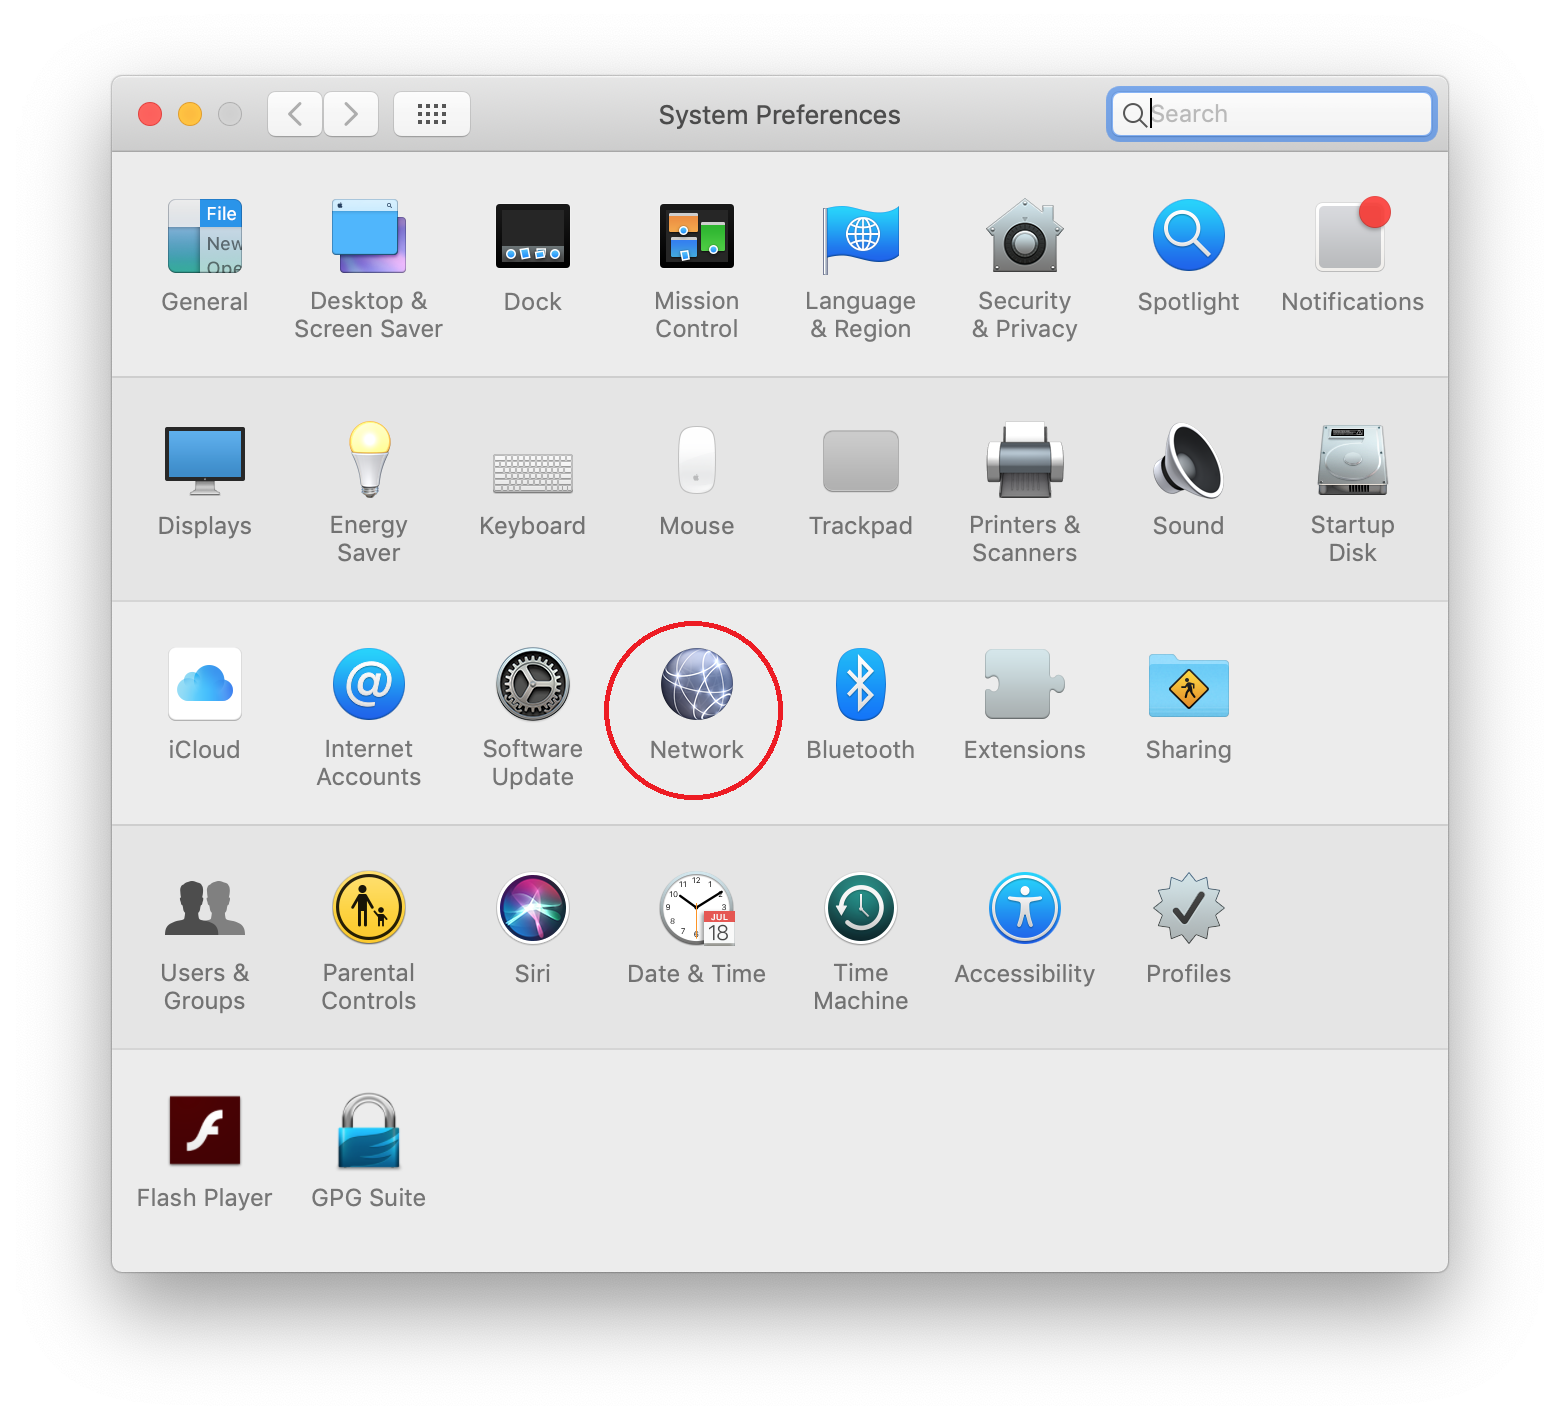
- Open
Networkin System Preferences.
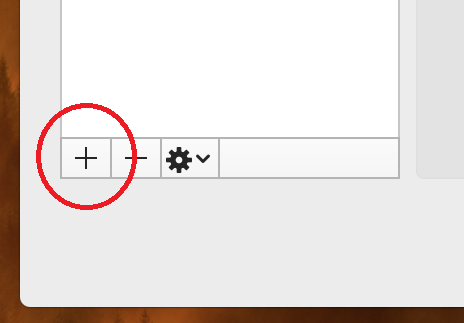
- Click the
plus signat the left bottom to add a VPN connection.
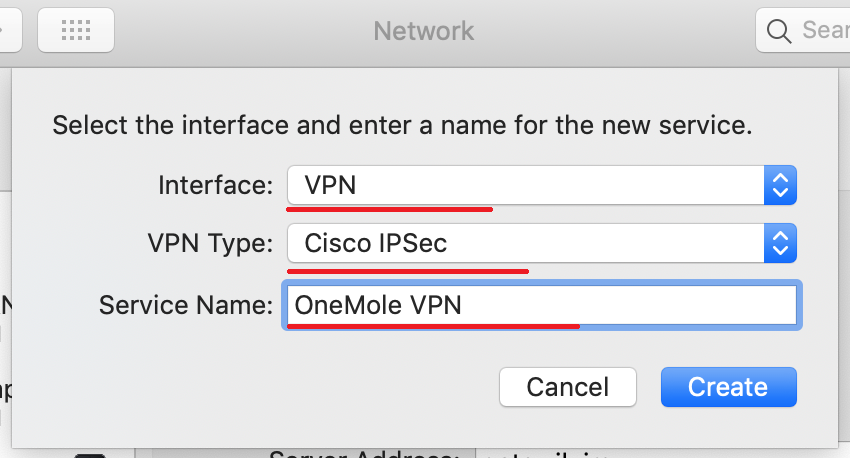
- Choose
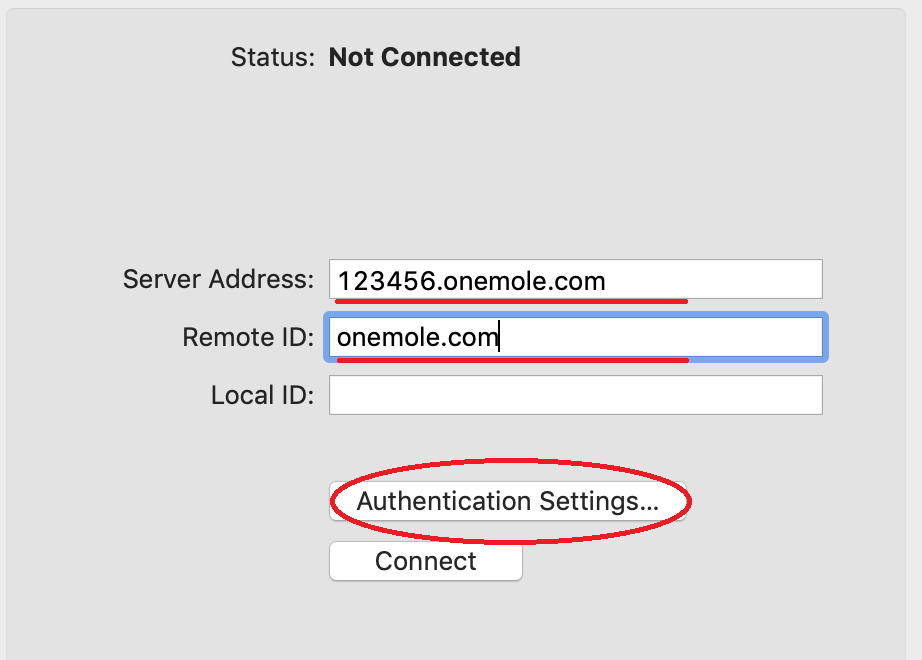
Interfaceas VPN, chooseVPN Typeas IKEv2,Service Namecan be anything.

- Enter Server Address and Remote ID (same as the server address, NOT IP), click
Authentication Settings.
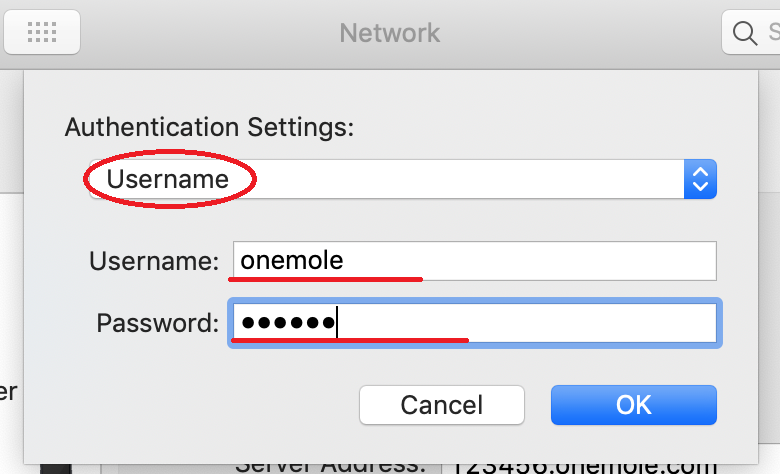
- In
Authentication Settings, chooseUsername, and enter your OneMole VPN Username and Password.
IKEv1
The following describes manual setup of VPN connection. However, you may simply download the corresponding configuration profile from https://my.onemole.net, tap on the profile and import to your MacOS system directly without manually setting up the connection.
Add a new VPN connection in the same way as IKEv2 VPN.
- Select
Interfaceas VPN, chooseVPN Typeas Cisco IPSec,Service Namecan be anything.
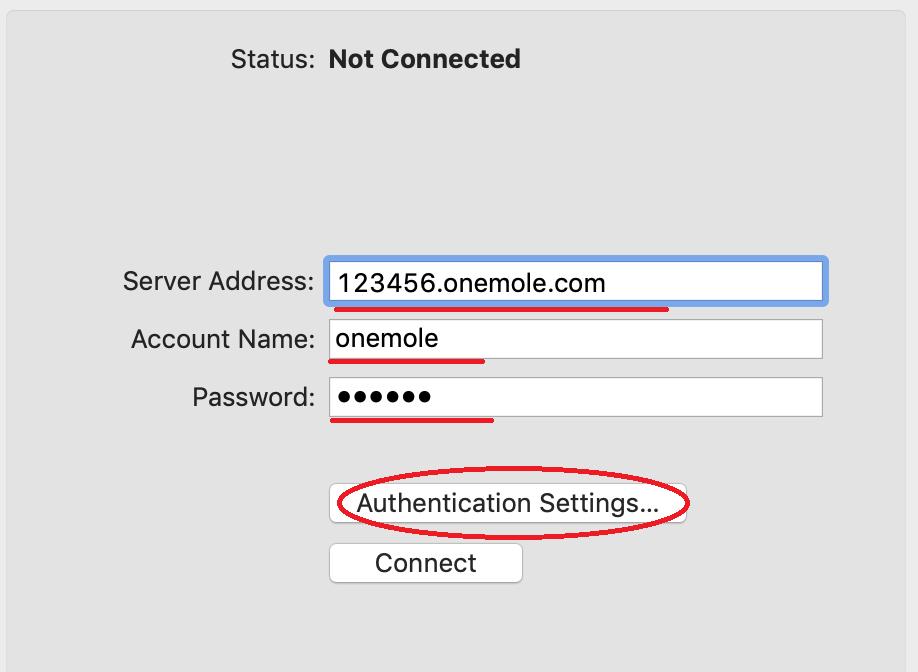
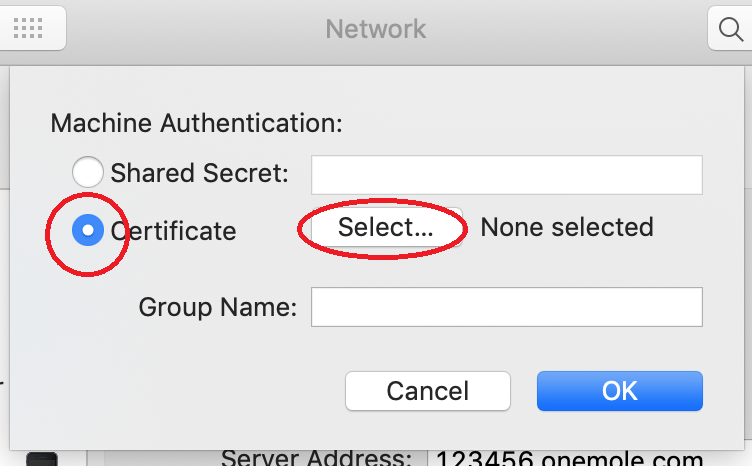
- Enter your Server Address, Account Name, and Password, click
Authentication Settings.
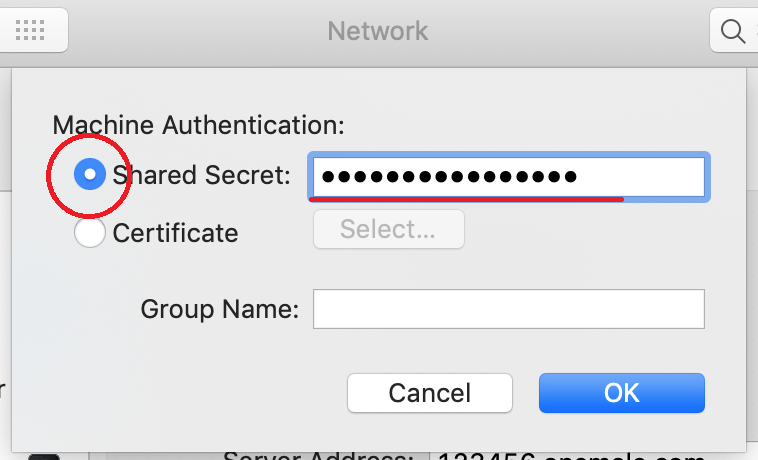
- If you want to use OneMole VPN Pre-Shared Key (PSK) to login, enter Shared Secret and you can now connect your VPN, the pre-shared key can be found at https://my.onemole.net.
- If you want to login using your VPN certificate, you need to import your VPN certificate first, and then click
Certificate, and choose your certificate.
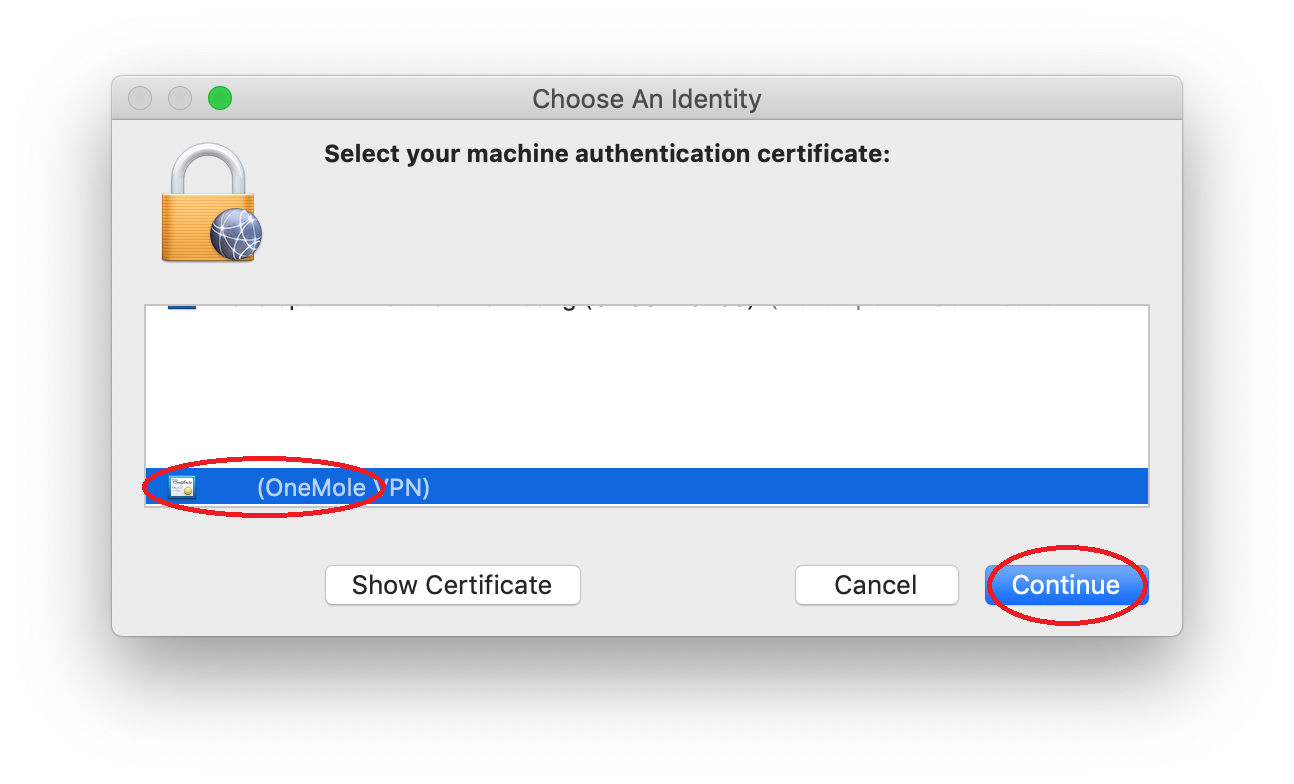
- Choose your certificate, click
Continueto connect to your VPN.
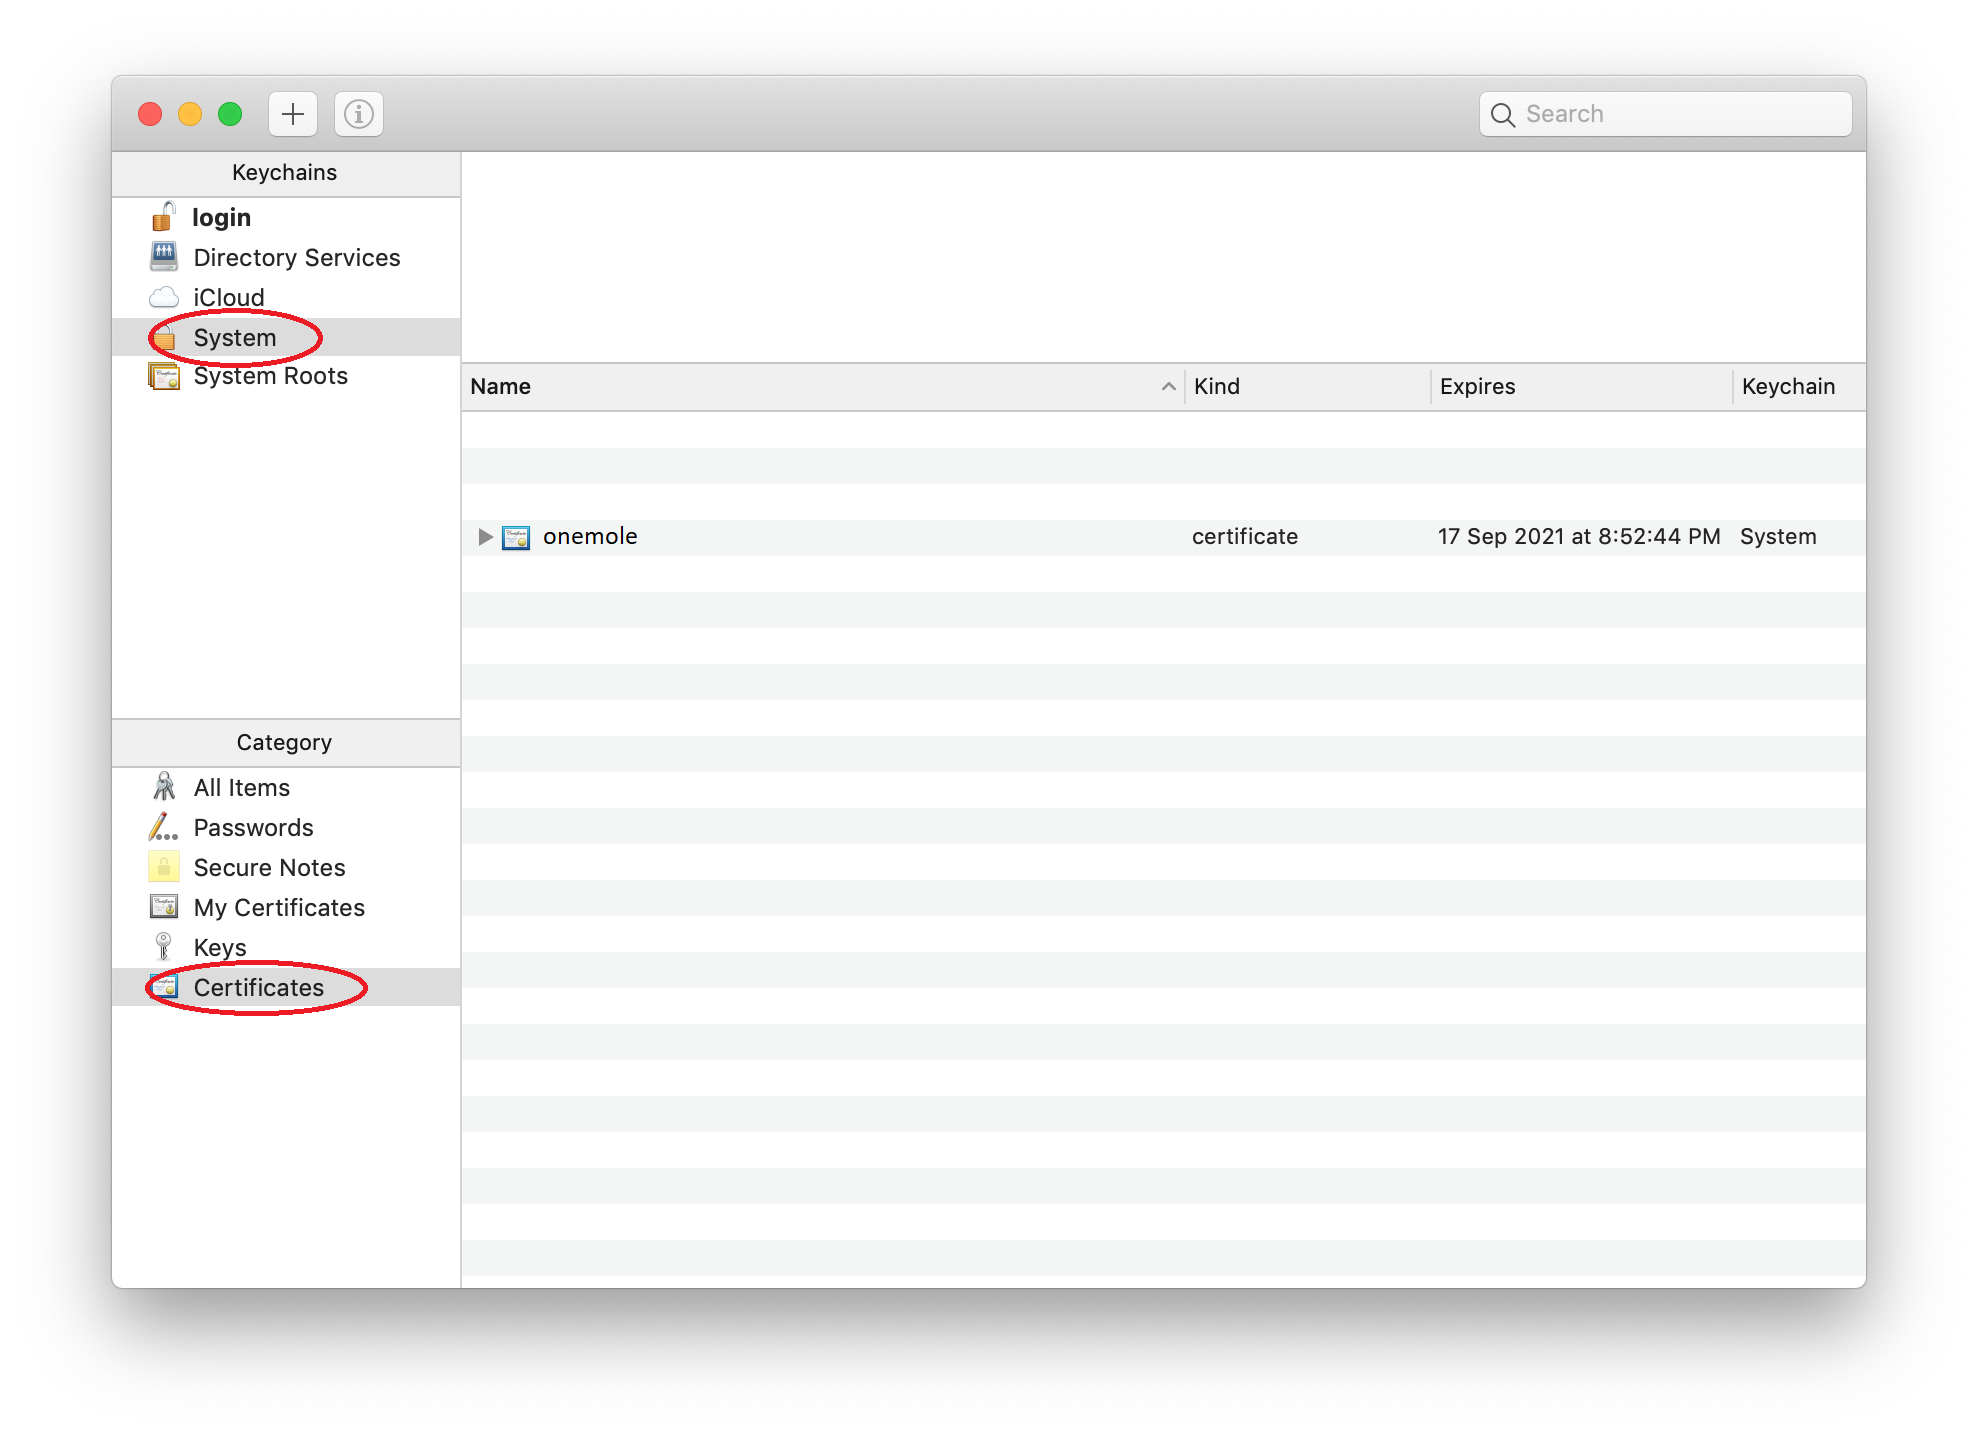
- Before you can connect to your IKEv1 VPN using your VPN certificate, you need to import your OneMole VPN certificates. Open
Keychain Access.app, and selectSystemkeychain, andCertificatescategory. Drag and drop the user certificate downloaded from https://my.onemole.net into the right panel.
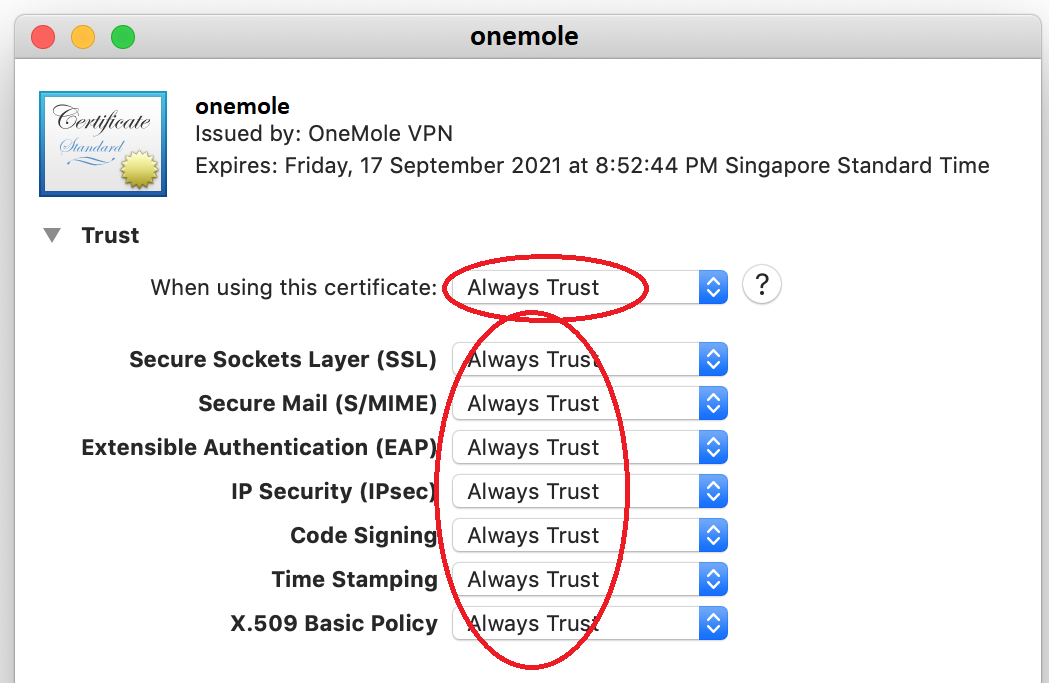
- Right click the certificate that you just imported, click
Get Info.
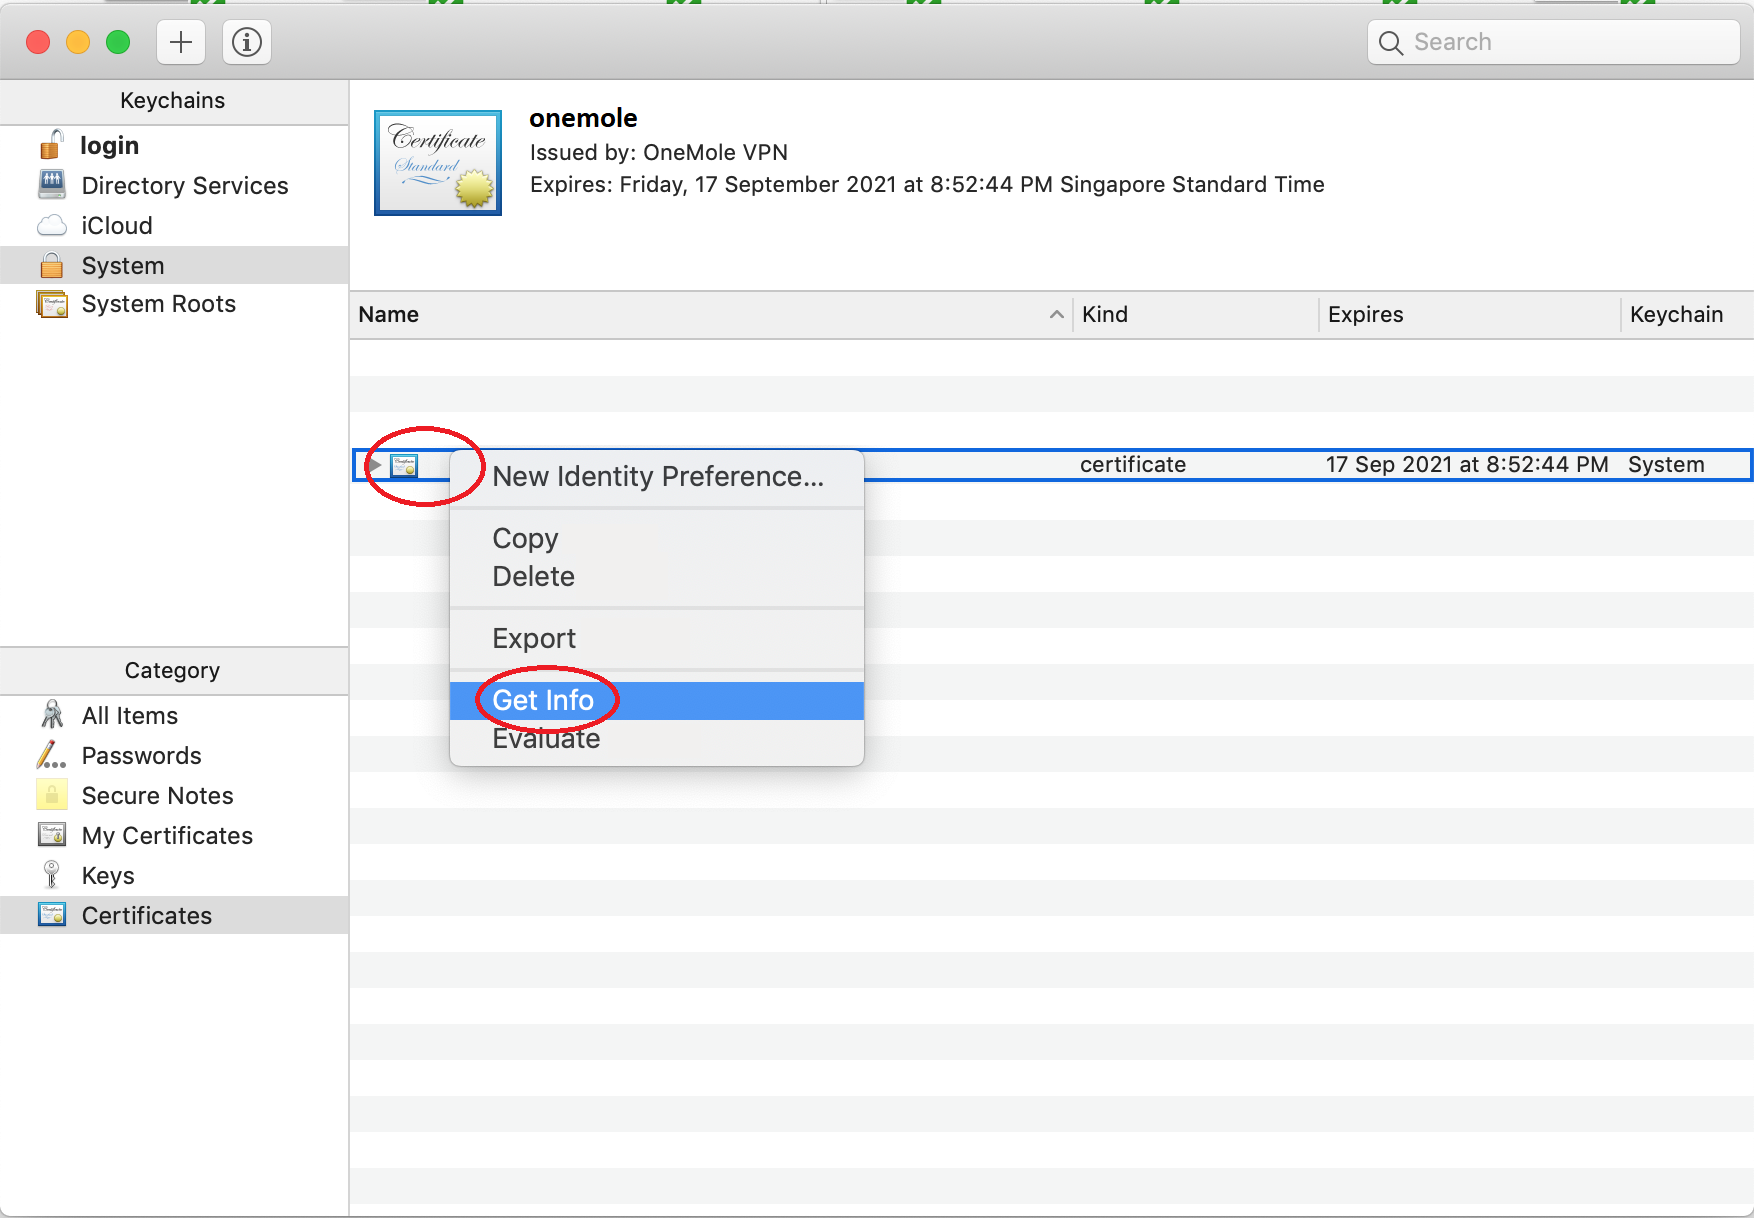
- Change all Trust settings to
Always Trust.
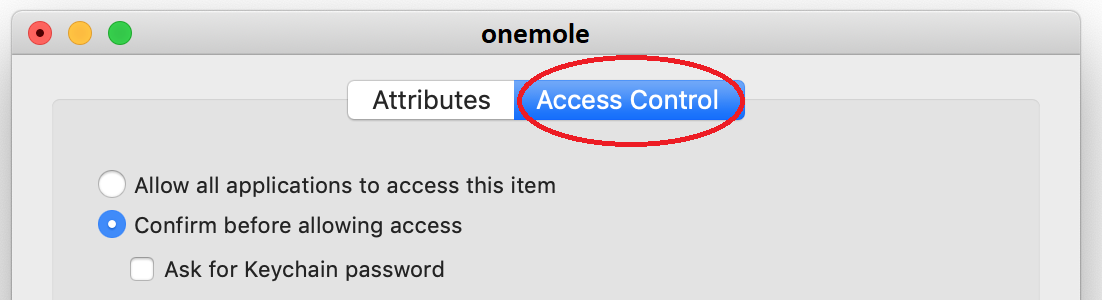
- Go back to
Keychain Access, click on thetriangularon the left of the certificate, right-click the private key, and clickGet Info.

- Click
Access Controltab, and click theAllow all applications to accessbutton.
Now you can access your IKEv1 VPN on MacOS High Sierra using your certificates.
Cisco AnyConnect
Please download and install AnyConnect Client, and refer to the Windows 10 section to setup your AnyConnect VPN.
You need to import your OneMole VPN certificates. Open Keychain Access.app, and select System keychain, and Certificates category. Drag and drop the user certificate downloaded from https://my.onemole.net into the right panel.
Right click the certificate that you just imported, click Get Info.
Change all Trust settings to Always Trust.
Go back to Keychain Access, click on the triangular on the left of the certificate, right-click the private key, and click Get Info.
Click Access Control tab, and click the Allow all applications to access button.
Android 4.3
IKEv1
IKEv1 VPN on Android is similar to iOS. You may import your VPN certificate and use IPSec Xauth RSA. Or use IPSec Xauth PSK without certificate.
IKEv2
The following describes manual setup of VPN connection. However, you may simply download the corresponding configuration profile from https://my.onemole.net, tap on the profile and import to your strongSwan APP directly without manually setting up the connection.
You may download strongSwan to use IKEv2 EAP connection. You do not need certificate for IKEv2 VPN.
Fill up Server with your VPN domain or IP.
Fill up Username and Password. Check Select automatically under CA certificate.
Tap on Advanced settings and enter your VPN domain into Server identity, do not enter VPN IP.
Save and start using IKEv2 VPN.
AnyConnect
You need to download and install AnyConnect client. Please refer to the iOS section for more details.
If you're looking for fast VPN with dedicated IP and bandwidth, you can sign up our Personal VPN now and enjoy 3-day free trial.